
Digitizing Your Closet with AI: How to Create a Digital Wardrobe Without Perfect Photos
If the idea of digitizing your closet makes you immediately think “that sounds like a whole project,” you’re not wrong - but you are probably overestimating how complicated it needs to be.
I know this because I put it off for years.
Not because I didn’t like the idea of a digital closet. I loved the idea. I even had a very rough version once and appreciated how useful it was. I stopped using it because the photos drove me crazy - bad lighting, even worse background removal, and poorly cut-out images that left bits of the model behind - and it felt nearly impossible to get the clean, consistent images I truly wanted.
Meanwhile, I’ve watched other people have the opposite experience - their wardrobe was fully digitized, but bad photos made the app frustrating to use, and over time, they simply stopped opening it.
Same problem. Different starting points.
The real hang-up isn’t the app itself.
It’s the photos.
And this is where AI (Artificial Intelligence) tools change everything.

The Photo Myth That Stops People From Digitizing Their Closet (and Using a Wardrobe App)
I always wanted my closet digitized. I wanted to lie in bed at night and choose my outfit for the next day. But I couldn’t wrap my head around the photo process needed to make that work.
Closet apps function best when they have clean, individual images of each garment. Creating those manually is a big lift - and honestly, I’ve got better things to do than spend hours staging clothing photos.
So often, the process stalls before it even starts because many people assume you have to spend a lot of time an effort taking great photos.
Let me be the first to tell you -
You don’t need good photos.
In some cases, you don’t need to take photos at all (yes, I’m serious).
You simply need an AI tool and enough information.
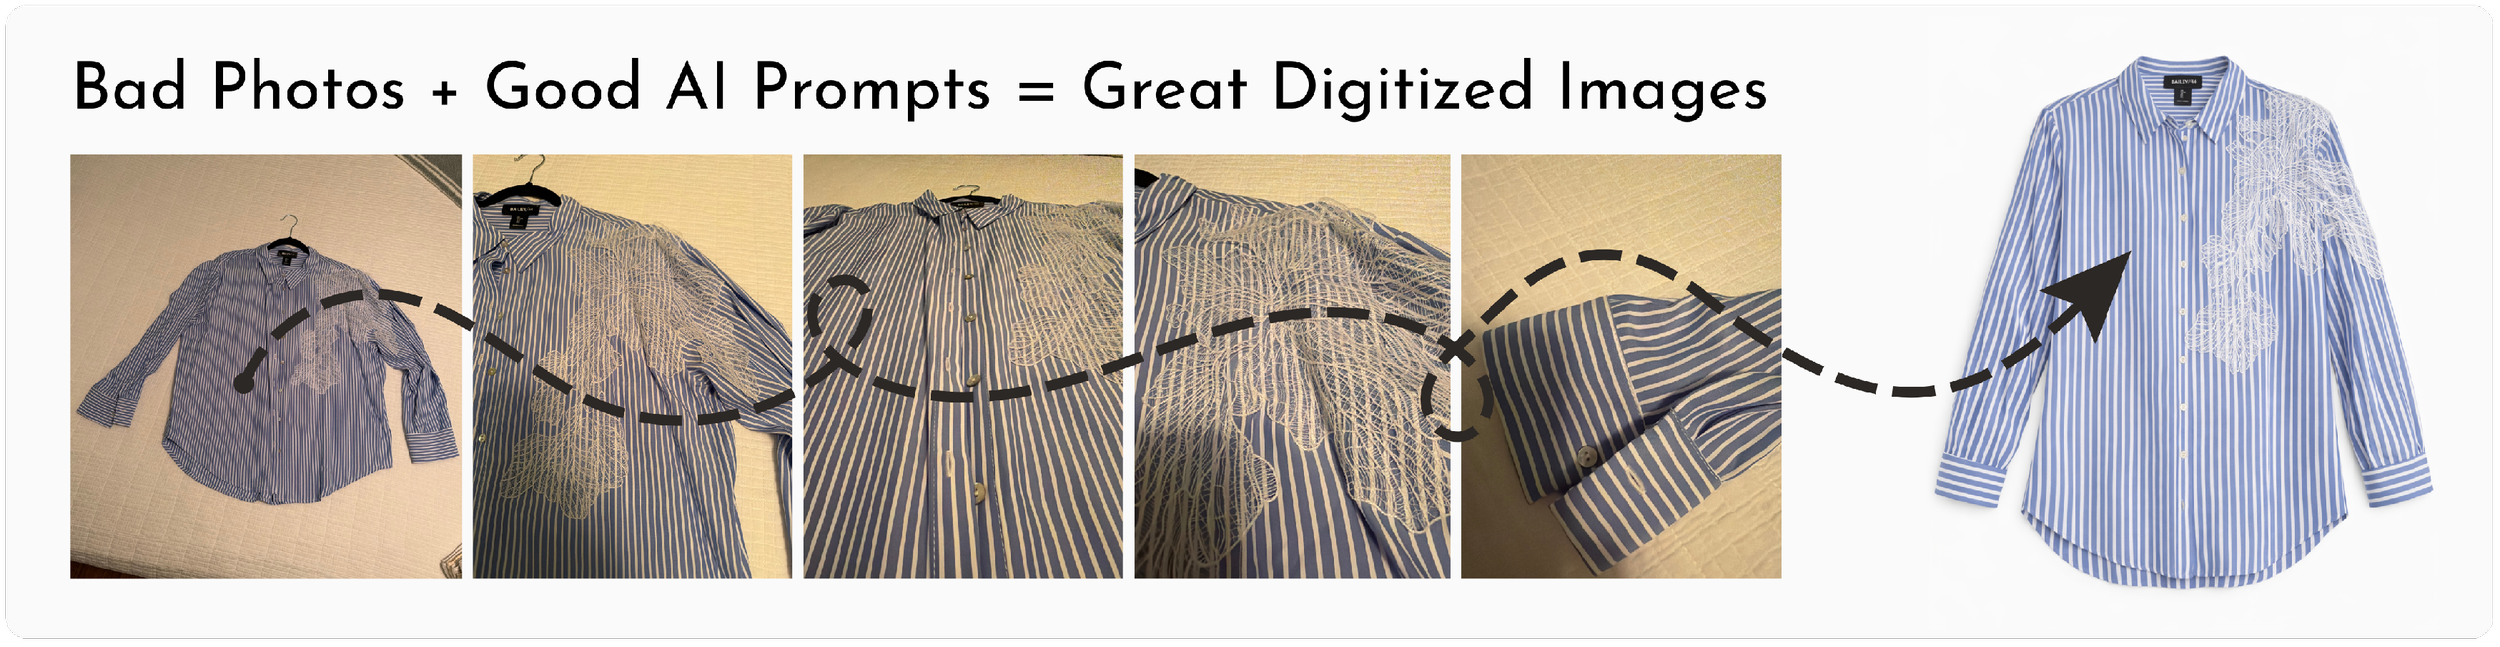
AI can work with fuzzy thumbnail photos from order confirmation emails, stock photos in the wrong color, clothing shown on a model, or wrinkled iPhone photos taken on your bed. It’s remarkable what it can do with very little.
FIRST - Shift Your Mindset.
You Don’t Have to Photograph Everything to Digitize Your Closet.
This is where people tend to overwork themselves.
If you’ve ever ordered clothes online, you already have a treasure trove of usable material:
old order confirmation emails with thumbnails
links to active product listings
saved stock photos you’ve forgotten about
Stock photos are incredibly helpful, even when they aren’t perfect or are “wrong.”
Front view, back view, side view - all are useful. Even if the color is wrong or the item is on a model, you can simply say so in the prompt.
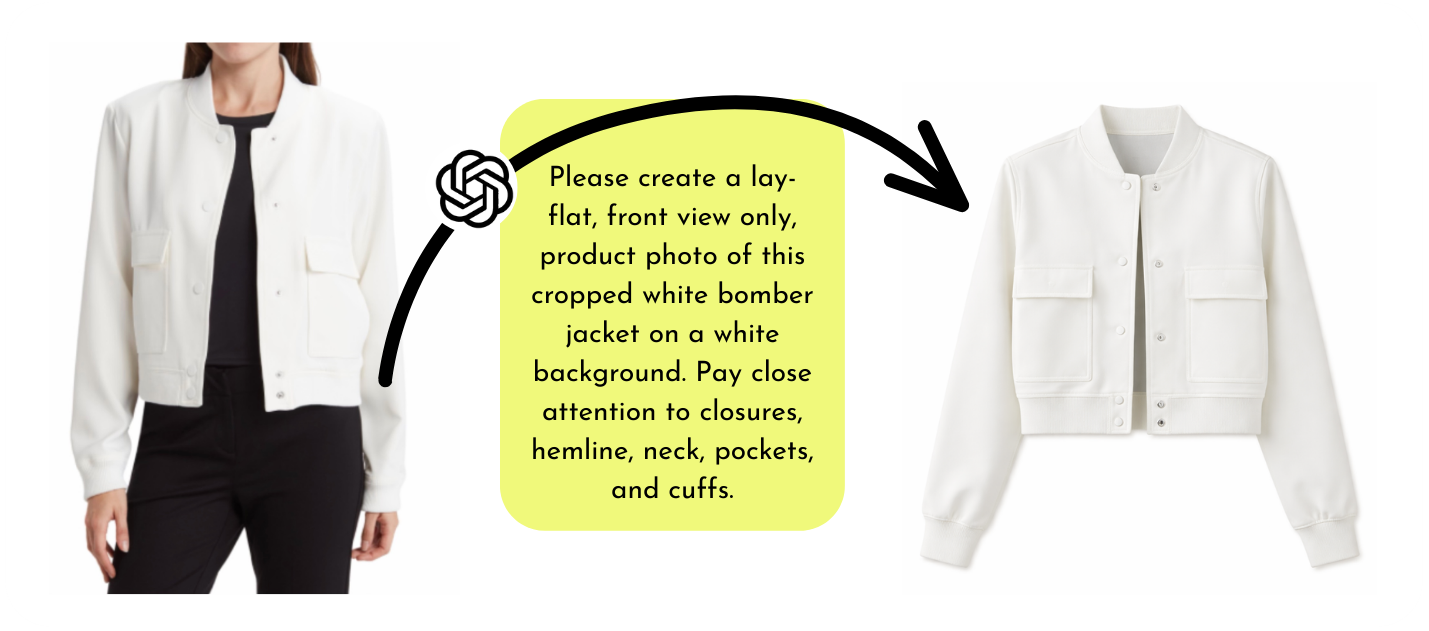
AI works best when you tell it what to change. You don’t have to give it flawless material upfront.
If the item still exists online, you can use that - even if:
It’s the correct item but the wrong color
it’s styled on a model or mannequin
the size shown doesn’t match yours
it’s not the exact item, but very close.
AI can adjust. You just tell it what’s wrong.
I digitized a meaningful portion of my closet while sitting on the couch, watching Netflix, pulling images straight from old emails. Zero effort. Fully effective.
Using AI to Create Closet App Photos: Why the Prompt Matters
This part matters more than people expect.
AI tools have limits on how many images or requests you can process in a given period of time - especially on free plans, and even on paid plans once you’re working at volume. Every time you ask for a tweak or revision, that counts as another request.
So instead of starting with a vague prompt and slowly adjusting things one change at a time, you’ll get better results (and use fewer requests) by front-loading your instructions in the first request.
Adding details like fit, length, color tone, fabric, and construction in the beginning saves time, reduces frustration, and keeps you from hitting processing limits faster than expected. You don’t need to include everything every time - but the more of this you cover upfront, the fewer revisions you’ll need.
Just to get your mind thinking of things, here are garment qualities I found myself constantly correcting when I first began digitizing my own wardrobe. Once I figured out what mattered to me, I built those details into my initial prompts so I wasn’t stuck doing the “that’s close, but…” back-and-forth five times in a row.
1. How the garment should be shown
Lay flat or hanging
Natural placement (not overly styled or stiff when laying)
Waist tucked (or not)
How close shoes are placed together / how close sleeves sit to the body
2. Fit and proportions
Your actual size
Whether it should look fitted, relaxed, or structured
What not to change (don’t make it oversized, shrunken, boxy, etc.)
3. Length and shape
Cropped, hip-length, midi, maxi, longline, etc.
Where hems, sleeves, or pant legs should hit
Pay attention to the proportion of sleeve length to bodice length
4. Color and tone
Exact color (or undertone if it runs warm/cool)
Heathered, textured, or solid
What it should not drift toward (too pink, too gray, too dark)
5. Fabric and texture
Knit vs woven
Lightweight vs thick
Smooth vs textured
Semi-sheer vs opaque
6. Construction details that matter
Unique seam lines or darts
Bottom hem depth (narrow hem vs 3-4” hem)
Cuffs or gathered hems
Pleats, gathers, wraps
Zippers, buttons, pockets, belts
Anything unusual or easy to miss
7. Cleanup instructions
Smooth wrinkles
Remove shadows
No leftover body parts, arms, or mannequin bits
This may feel like a lot - but this list isn’t meant to be rolled into every single prompt. It’s here to help you spot the details that you care about, so you can include them upfront and get a usable image faster.
Universal Base Prompts for Your AI
Below are a few universal base prompt examples you can start with. Customize these so they fit what you’re working with - and so they feel natural to you.
If you’re digitizing several pieces in a row:
Before you start, give your AI tool a heads up about any directions that should apply to all of your requests. This helps reduce repetition and keeps results consistent across images.
I will be giving you multiple, separate requests for stock images of clothing pieces. For each, I need a clean stock photo on a white background. Please smooth out wrinkles and remove shadows. Pay very close attention to seams, hems, zippers, pockets, and collars - details matter to me. Each garment should reflect a size [your size]. Please keep proportions true to that size and do not make it look oversized or smaller. Remove any remaining mannequin or body parts so the garment stands alone cleanly.
If anything is unclear, ask before making assumptions. Please remember these directions for all future requests related to digitizing my closet, in addition to any garmet-specific instructions I may add to a particular photo.
For individual pieces:
I need a [lay flat / hanging] photo for this piece. The length is [cropped / hip-length / midi / maxi / longline], and it is a [fitted / relaxed / structured] garment. Please reference the photos for color - it is a [describe color and undertone]. The fabric type is [knit / woven / fleece / etc.]. Please preserve the fabric texture and any heathering pattern.
From there, add any construction details that matter for that specific piece (hem depth, cuffs, seam lines, pleats, wraps, closures, or anything easy to miss).

A Note on AI Platforms
You may already have your favorite AI platform, or you may be brand new to AI.
Either one is completely ok.
If you already use AI, then you likely already know which platform you prefer.
For those of you newer to the world of AI, this is a great entry point - you’ll learn by doing something immediately useful and fun.
I used ChatGPT exclusively for digitizing my closet and was very happy with the results. I do use other AI tools in my work and personal life, but ChatGPT consistently produced the best “stock-style” images from imperfect inputs.
I do have the paid version ($19.99/month at the time of writing), which mattered when working through a high volume of images. Free plans often limit how many images or prompts you can submit in a short period (as I briefly mentioned in the previous section). I’ve known people who paid for one month, digitized their entire closet, and then canceled the paid plan - a worthwhile trade-off.
If another platform feels more comfortable to you (Claude, Copilot, Gemini, Grok), start there. If results aren’t great, reuse the same prompt elsewhere. AI can be oddly opinionated. Sometimes it just needs a different brain.
If you’d like some extra support (and a little laughter along the way), I offer affordable, virtual one-on-one sessions where I’ll walk you through how to prompt AI and do this yourself - no experience required.
Taking Photos for a Digital Closet: Why “Good Enough” Works
When I took photos, I kept it extremely simple.
No backdrop. No staging. Just a white comforter on my bed (a white sheet or shower curtain works, too).
I’d grab 5–10 pieces at a time, toss them on my bed one at a time, snap photos, and put them right back where they came from. No setup. No major styling.
For each item, I’d take:
one full garment shot
three to five close-ups (fabric, seams, hems, neckline, pockets, closures)
photo of the tag for reference
That’s it.
I’d make sure the photos were in focus and as well-lit as I could make them without effort, but they weren’t pretty, and they didn’t need to be. They were data for AI, not final images.
Decide How Perfect Is “Perfect Enough”
This step will save you hours, and it matters more than people realize.
Ask yourself:
Will I notice / be bothered if a seam line or hem isn’t exact,
or do I just need the image to work for outfit planning?
Perfection costs time.
Time kills momentum.
There’s no right answer, but deciding this before you begin will save you hours of unnecessary adjustments.
The Approach: A Simple, No-Confusion Way to Work Through Your Wardrobe
What made this manageable was working in physical order, not clothing categories.
Here’s the order I followed:
Main Closet:
Hanging closet items
Folded shelves
Bins / boxes
Shoes
Dresser drawers
Purses and bags
Belts
Jewelry and other accessories
Coats and jackets
Clothes stored elsewhere
secondary closets
off-season clothing
etc.
I didn’t jump around. I didn’t batch by shirts or pants. I simply went left to right, one item at a time, without skipping anything.
tied a red satin ribbon onto the hanger of the last item I photographed. When I came back - later that day or days later - I knew exactly where to start again.
Zero tracking. Zero confusion.
Where Laundry Fits In - and How to Handle It
Laundry will happen while you’re building your very cool, very new digital wardrobe. That’s just life.
Here’s the simple rule that keeps everything untangled:
If clean laundry goes back into a section you’ve already photographed, snap the photo before putting it away.
If it goes into a section you haven’t reached yet, just put it away. Its turn is coming.
That’s it.
Two Things You Don’t Have to Do
You do not have to digitize EVERYTHING in your wardrobe.
I personally chose not to digitize my sleepwear, my shapewear, or my intimates. I didn’t skip these because they don’t matter - I skipped them because I don’t build outfits around them. If you want everything in your app, go for it. Just remember, this whole thing is about usefulness, not rules. It’s ok to leave things out if it just doesn’t make sense to include them.
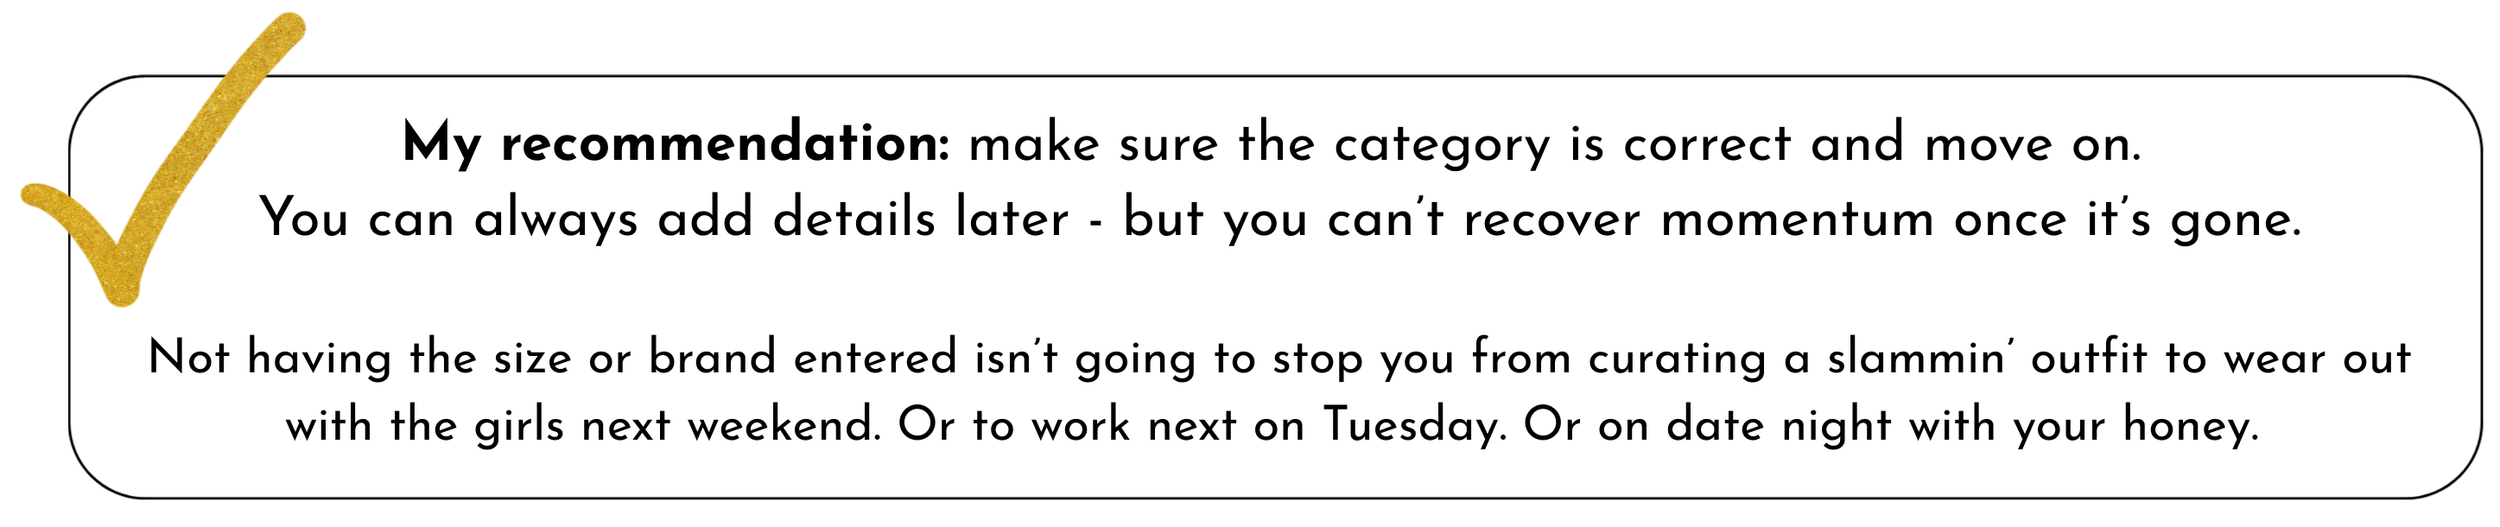
You don’t have to complete every single field in the wardrobe app.
You’ll notice that most closet / wardrobe apps have fields for:
Category
Brand
Size
Color
Purchase date
Price
… and tags of all sorts.
Here’s the honest question: Do you really need all of that?
If having every field filled out makes you feel calm and complete - go for it.
If it slows you down and makes you want to quit - skip it.
Save Your Final Images (Future You Will Thank You)
Once you have final images you’re happy with, save them in a dedicated folder somewhere and preferably, back them up. They might just live in your phone’s photo app area that’s backed up to the cloud automatically, and that’s fine. Maybe you have another solution. Just have them somewhere (other than your chosen wardrobe app) where you can use them again if needed.
Apps change. Platforms evolve. You don’t want to redo this work if you ever switch tools.
A Quiet Bonus You Might Not Expect
Something subtle happens when you move through your clothes this way.
You notice things.
Pieces that don’t fit anymore.
Things you avoid wearing.
Clothes that belong to an older version of you.
Life is just too short for clothes that make us feel less than amazing. Less than -
…strong
…pretty
…handsome
…wonderful
…warm
…cozy
…professional
…sassy
…joyful.
Find the words that matter to you - and apply them to everything you pull from your closet or dresser.
If something no longer fits your body, your life, or who you are right now, give yourself permission to pass it on.
We all change. That’s the beautiful part of living.
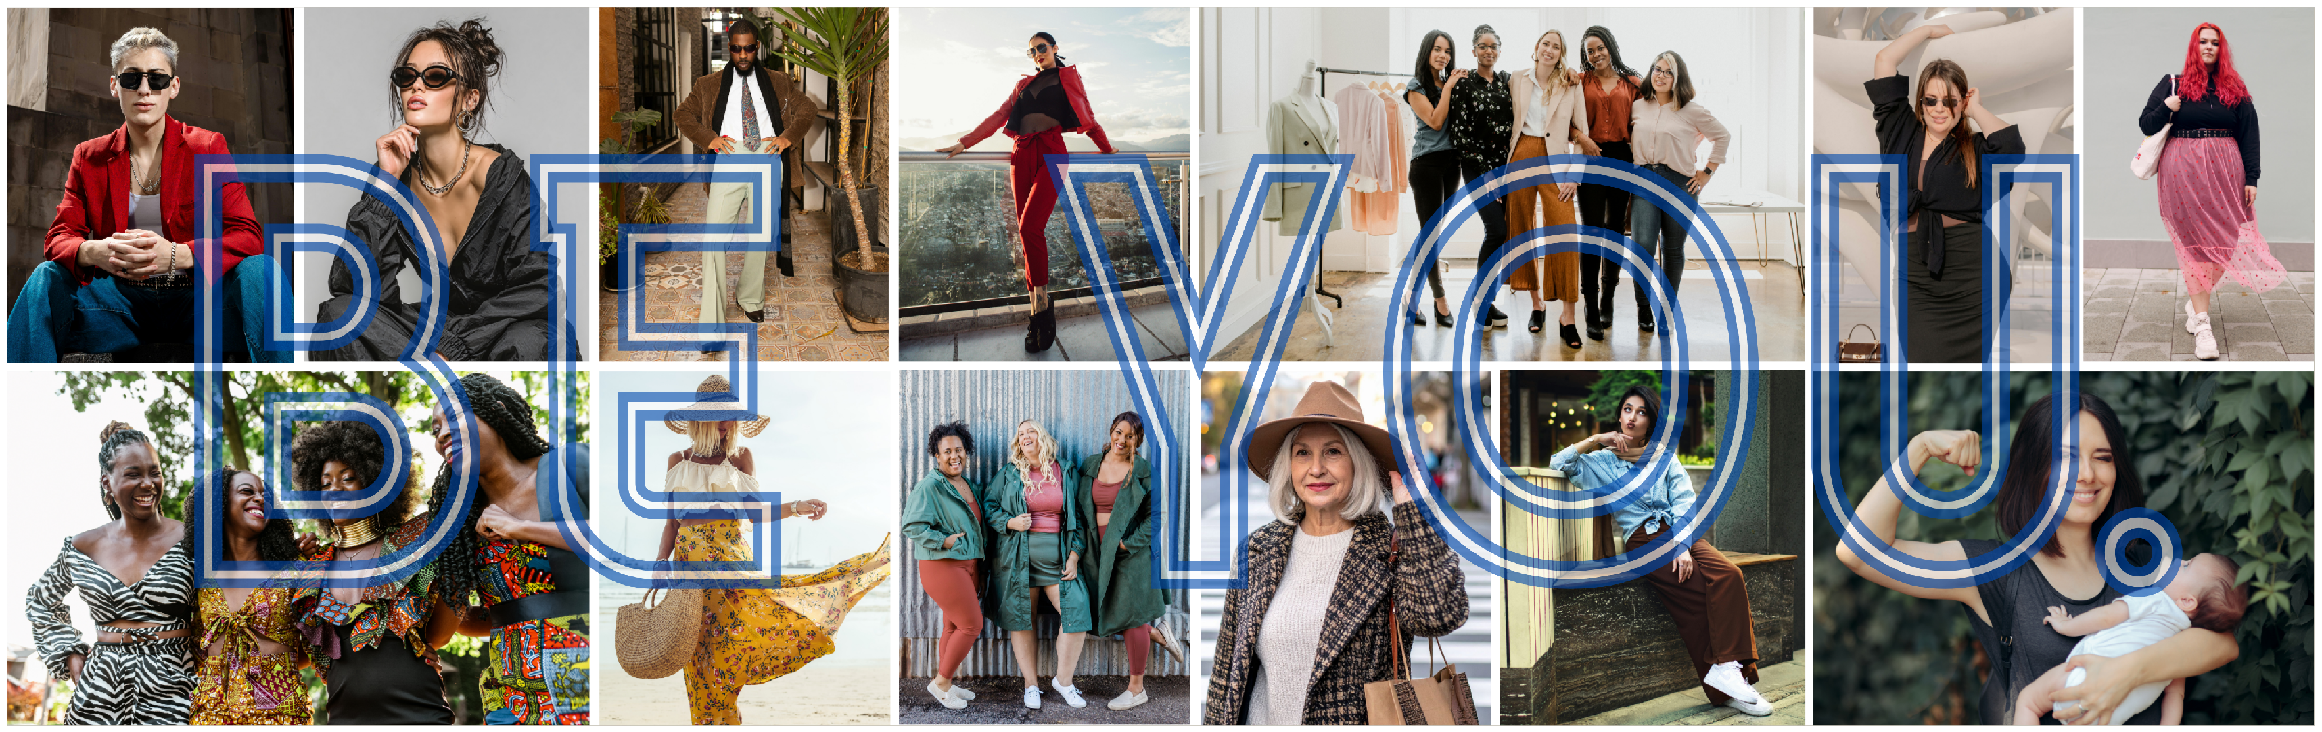
Digitizing your closet isn’t just about building outfits in an app.
It’s about dressing for who you are right now - and loving every minute of it.
Hey there! I’m Kerry, and I’m a professional home organizer serving the Portland, Oregon and Vancouver, Washington areas. I also travel up to the Mat-Su Valley region of Alaska (Anchorage, Palmer, Wasilla) a few times a year - going everywhere clearing clutter from people’s homes. I’ll meet you where you're at, zero judgment (and will bring along a sense of humor).
We can declutter, organize, and create spaces that support the life you want to live!
If you’d like, you can learn a bit more about me here.
Want to schedule a no judgment, complimentary consultation? I’d love the opportunity to meet you, hear your story, and learn how I can help.